Thursday, February 24, 2011

Mushrooms for the Urban Home: Outdoor Inoculated Logs

I really love the idea of foraging and finding food in the wild, maybe it is my Metis roots reviving when I am out in the forest and I can smell the earth and feel the cushion of life under my step. I have been fascinated by the idea of eating mushrooms but terrified that I might be lousy at it and poisoning myself.
When I heard about inoculating logs with specific spores and knowing with certainty what you are harvesting, I was keen to give it a try.
Inoculated logs are easy to get going and take up very little space so can fit easily in an urban or suburban landscape.
Also, logs need to be located in a dark, damp area so if there is a location in your yard that won't grow grass, or already grows mushrooms, that would be a good location.
Imagine if between houses there were little patches of inoculated logs growing mushrooms.

The first step with getting the logs set up is to acquire the logs. You need fresh cut (no more than 6 months old) logs that are about 4-5 inches in diameter and about 4 feet long. If it is fresh cut then then the log likely has more moisture in it and less bugs or mushroom spores.
Hardwood is best and I imagine that it has more for the mushroom to work with. Softwood probably succumbs to rotting quicker than hardwood.
Here I used some branches from an Elm tree that was damaged due to a heavy spring snowfall. They were more than 6 months old so I am not sure if it will work.
After the logs are cut, you drill holes in the log 2 inches apart in a diamond pattern around the log. Drilling instructions with drawings and a drill bit in the right size came with my kit.

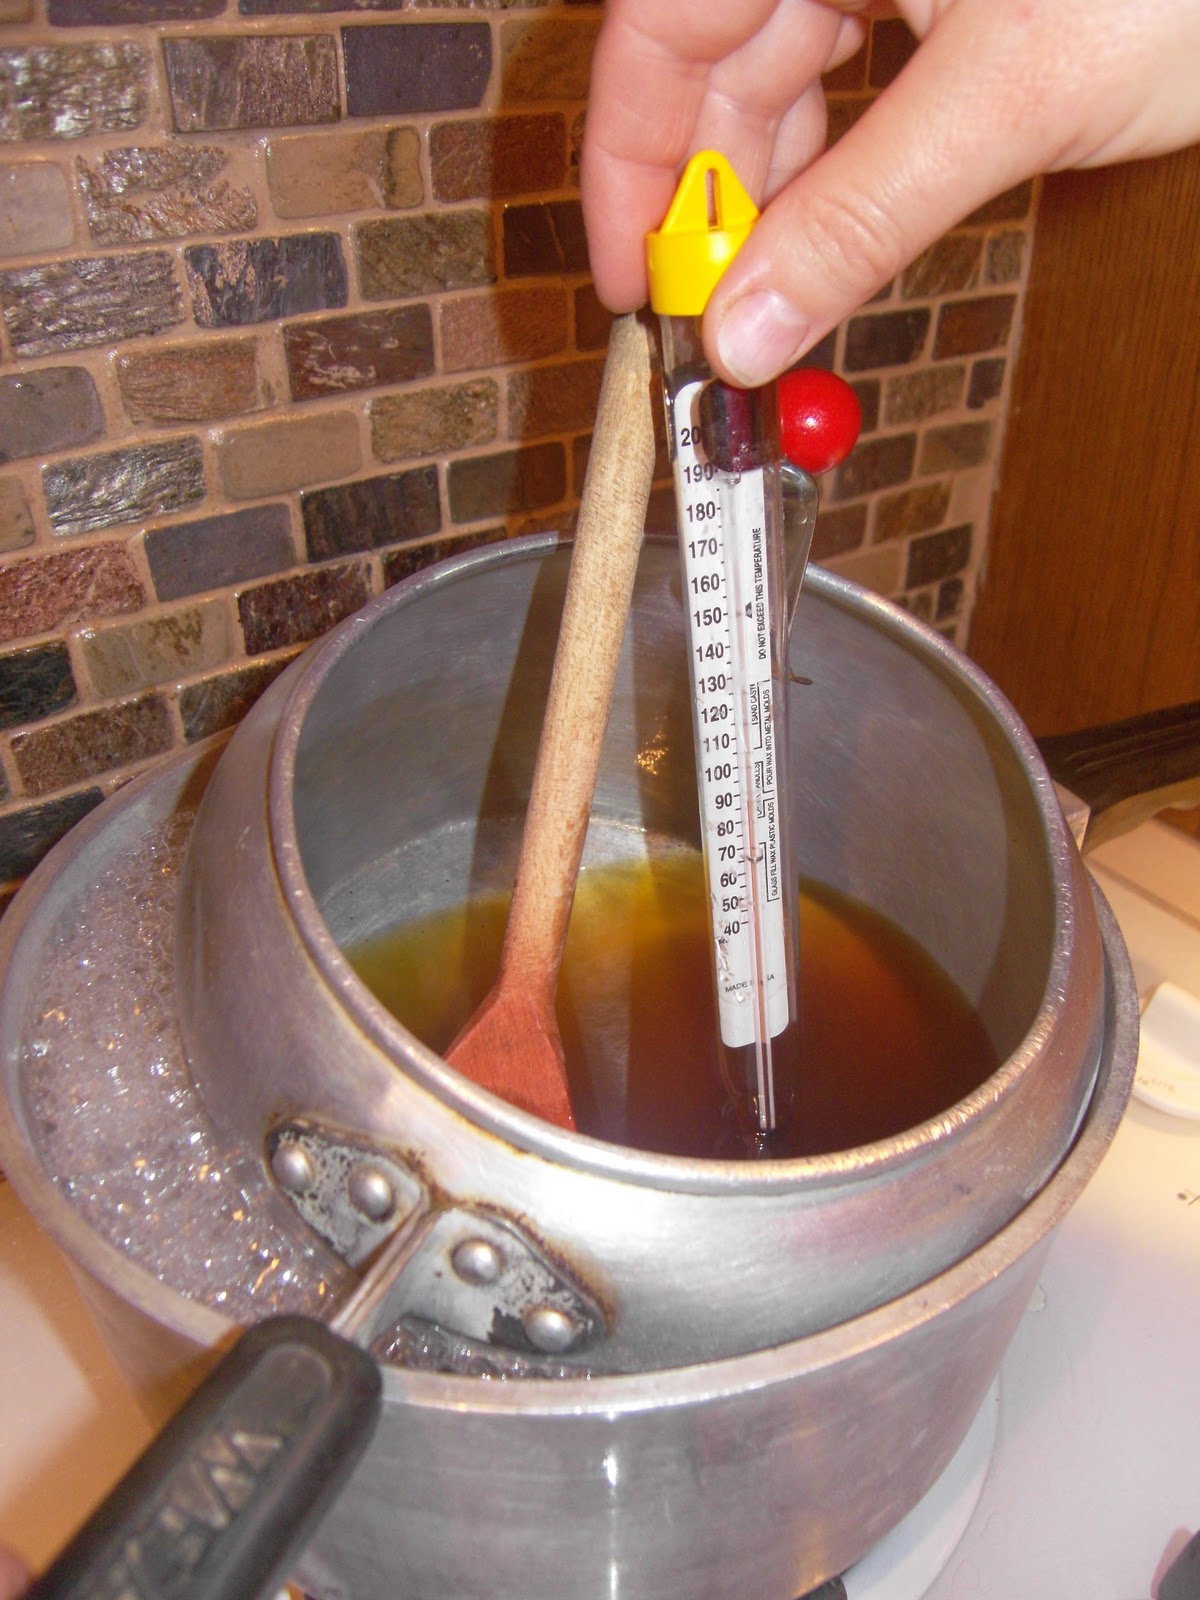
I then hammered the spore plugs into each hole so that it was deeper than the bark or at least level with it. After that, I melted some bees wax in a double boiler that I already had acquired for making candles. 
I don't know if there is any poetry about the smell of beeswax melting but it is a fragrance that deserves an epic poem or an album of songs. Ditch the fake household plug-in fragrances and melt some beeswax to make your home smell rich and fresh.
I just painted the wax over each plug with a sponge applicator. It took me a few rows before I realized that I should pain the wax down the length of the log to allow time for the wax to cool. I was going around in circles and wax dripped all over my stove. 


When I looked in my yard for an ideal location, I wanted a place that was shaded, moist and preferably already grew mushrooms. I picked just North of a big Spruce tree as that spot was out of direct sunlight almost all day. It is also not a pathway for ourselves, our dogs or our chickens. 
I placed some wood shavings on the snow bank so that the logs would be on moisture absorbing wood too. I wanted to mimic a forest floor so added some wood to the area. I didn't want to add used chicken bedding because I don't know if any pathogens would be soaked up by the mushrooms. I will need to check that out. I didn't use compost because I am not sure if my compost is perfectly weed free.
I placed one end of the logs on top of a twig so that it would get air circulation. I have no idea if that is important, I was trying to mimic fallen trees in the forest. 


When I first ordered the plugs, my plugs turned green and moldy. The fellow I ordered them from said that the bag might have been left open or it might have frozen. Oops, maybe I left the bag open a bit after I got them and before I tried to use them. I could have thrown them out but thought that I would place them in the same area to see if they would work anyway. If not, it is nice humus for the ground.
I covered the logs with more wood shavings.
Lastly, I covered it with a pile of snow.
I will keep you updated as to how it looks in the spring.

So if you can use a drill, then this is definitely something you could do in your own home.
Try to find a local supplier of mushroom log kits by doing and internet search in your town or city, then your province or state, then your country.
Once you get your logs set up, check out the medicinal uses of different mushrooms and find some nice recipes for cooking from fresh.
You can dry mushrooms and you can even preserve them in oil, vinegar or honey.

I hope I have convinced you that even if you have a black thumb (not green), or if you have no sunshine, or if you live in a balcony, or if you don't want livestock in your yard used mainly for pleasure (sitting in a deck chair), or if you don't want to pay daily attention to food production- you can still grow food by growing mushrooms.
Okay now look at my other mushroom post on how mushrooms can save the world.


Sunday, February 13, 2011

Mushroom Cultivation: Heal the Planet and More Ways of Providing Food

Shiitake Mushroom Logs, Deerholme Farm, 2010
Cultivating mushrooms is a fantastic way to grow food especially if you don't have land access or sunshine. You can grow mushrooms inside or out, you can even grow mushrooms in your closet. Also, they do not need as much care as an outdoor vegetable garden.

If you would like to expand your food self-sufficiency or grow food to sell or share with others, then growing mushrooms is an excellent food cultivation method.

I didn't even know you could cultivate mushrooms until I visited my brother-in-law, Chef Bill Jones, on Vancouver Island in BC. He was giving me a tour of his Deerholme Farm, when I saw a bunch of propped up logs with spots of green painted on them. He told me they were Shiitake mushroom logs that one could insert plugs infused with mushroom spawn and grow mushrooms in the logs. I was so intrigued to find another method of home food production. What I really liked about this method is that it didn't take up much space so it would be great for an urban yard.

Bill gave me the names of a few companies in Canada that sell outdoor log inoculating kits and as I looked at their websites, I found a few that sold indoor kits as well. The indoor kits are bags of growing medium that can grow different types of mushrooms. Some varieties can grow in the dark, in a dimly lit room or in indirect sunlight. So even if you live in a tiny apartment, you could grow your own food.

I completely love it when I find a method of growing food that is suited for small scale or home use. I love it when I can find a solution to food growing even if someone says that they can't grow food because they don't have a yard, a balcony, windows, time or even aggressive and destructive cats. I am thinking more and more that there are no excuses left for not growing your own food, or at least some of it.

Another exciting thing about mushrooms is that they have a lot of preservation methods, you can dry them, pickle them, freeze them or harvest them continually. There are lots of recipes on line and good cookbooks out there. Check out this (shameless plug for Bill Jones' book) The Savoury Mushroom.

It is recommended to eat from the Food Kingdoms: Kingdom Monera (kelp), Kingdom Protista (yogurt), Kingdom Plantea (tomatoes), Kingdom Fungi (Oyster Mushrooms), Kingdom Animalia (tuna). Try to expand your food cultivation into the 5 Food Kingdoms so that you have a diverse diet.

I am just a beginner with mushrooms, but in the short time I have gotten into it, here are some resources that I have found:

www.wyliemycologicals.ca
www.themushroompatch.com
www.gourmetmushrooms.ca

You might have to buy mushroom spores from your own country as some countries do not allow spores to cross borders. Do a search for mushroom growing kits and buy local.

Check out this fellow's video and pay attention to his set up. He made a shaded area in his yard using a pergola and shade cloth. Think about how many suburban and urban spaces are in the shade and how that space is wasted but could be turned into a food production area.


When you start getting good at growing mushrooms, then learn how to save spores, just like you save seeds. Find diverse mushroom types that are suited to your area and needs. Preserve the spores.

The other idea that I find incredibly inspiring is when you find an easy method of planet remediation. Check out this fellow talking about fungi and how it turned an oil soaked mound into a vibrant source of life using just mushrooms.

What I also found interesting is when he talks about when a huge asteroid hit Earth, resulting in dark clouds blocking sunlight and massive mushroom towers grew. I instantly thought of when Mt. St. Helen's erupted in the United States in 1980 and how for a time the sky was filled with sun shielding ash. When the volcano erupted in Iceland in 2010, again ash filled the skies. In areas that are experiencing temporary darkness or even seasonal darkness such as winters in the Arctic could grow mushrooms as an emergency food source or as a seasonal business.

Friday, February 4, 2011

Reducing Garbage: Used Coffee Grinds

In nature there is no waste. 
Part of being sustainable is reducing or eliminating your garbage creation. Even when we bury organic matter in landfills, it does not reduce down to useful bio-matter, it just sits there. Organic materials need air to decompose. All organic items can be converted into useful products if you help rather than inhibit the natural processes. So don't think that by throwing those daily coffee grinds into the garbage bag, that you are saving the planet.

Coffee grounds can be added directly to your compost pile or set aside for soil amendment.


pH: Unused coffee grinds have a pH of between 3 and 5* whereas coffee grinds after brewing have a pH of about 6.9**. Most plants like a pH of about 6-7.
You could add coffee grinds to soil to amend it for acid loving plants such as blueberries, but think of the environmental impact of growing and transporting coffee. I am not sure if there is a better solution for lowering the pH of your soil, but will look into it before I plant my blueberry bushes.


Carbon to Nitrogen Ratio: of coffee grinds is 20:1* whereas ideal ratio is 30:1*** so they are very near ideal for a compost


Vermicomposting: if giving all of your pets a treat at Christmas, give your worms some coffee grinds and if you listen closely you will hear them singing carols. Feeding coffee grinds to your worms will create those beneficial worm castings which are kind of like a sourdough starter for soil. Put the worm castings in your garden or in your compost or make a castings tea to spray outdoors.


Sheet Mulching: You may be holding a belief that you are a terrible gardener and it is likely just that you are dealing with terrible soil conditions. Building soil is something that is easy to do and coffee grinds can be used for it. Using a layering system of cardboard/newspaper and organic materials such as straw, hay, leaves, shredded tree clippings, and/or coffee grounds can build a rich mulch that will have your garden growing beautifully within 1 to 3 years.

How to do it:
Anytime of year, start dumping your coffee grinds, paper filters as well as tea bags into a container. The grinds will dry out to have no odour on your counter but inside the pile may develop a fungus or mould. If you are concerned about it, wear a mask when handling.****

Until you are ready to spread your grounds, place in a container such as a food grade plastic bucket. Leaving it outside to freeze is fine.

Share: 
Even if you know you won't use coffee grinds in your yard, or maybe you don't even have a yard, set them aside anyway. Ask any of your gardening friends, check your local community garden or put an ad on your local online classifieds that you have them to give away. As a consumer, you have a responsibility to find an appropriate end use for all of your 'garbage' materials. Work towards finding a beneficial use for all of your waste. The more you avoid using a landfill, the better it is for the planet and future generations.

* http://www.simplegiftsfarm.com/coffee-grounds-and-gardening.html
** http://www.sciencedaily.com/releases/2008/07/080707171641.htm
*** http://seattletilth.org/learn/resources-1/city-chickens/compostingchickenmanure
**** http://forums2.gardenweb.com/forums/load/soil/msg1022152317190.html

Wednesday, February 2, 2011

Land Access: Opening Up

I have a big list of projects that I have started that I haven't even written about, thinking that I would do the work in season and write about it in the winter when I had nothing to do. But to my surprise, I continue to be busy doing other projects that really are best suited to winter.
Part of what I am doing is researching projects and my list is fast growing. My difficulty is that I am really busy simply feeding the kids and doing laundry let alone get big projects going plus the kids are not at the age where they can do a lot of heavy work.
As if the universe was listening to my wishing, along came a local permaculturist who was looking for land access. He wanted to have access to land to run courses for local urbanites to learn how to convert their yard to a permaculture producing property. Since then another permaculturist has asked to run a course on our property for his courses.
They both proposed that they offer a class on our property and that we participate in the class by seeing the conclusion or even attending the lectures.
Our first phase is to have students come and look at the property to do planning. We come up with a list of what we would like built or planted and they figure out the best placement. Students are invited to share the plans with us when they are done and we attend the presentation.
I have an ever expanding list of projects but my first will focus on year-round food production, water catchment and maybe even housing. I would really like to have some WWOOFers who could live here, but in their own space. http://www.wwoof.ca/
Years ago I was researching how to build a tipi and wanted to build one for my yard. If we had some permaculturists here, I would pay for all the materials and the students would learn how to build it. I don't know any First Nations or Metis Permaculturists, so I may have to design a course myself.


So consider inviting a local permaculturist to run courses on your land to get more people learning about permaculture principles. I don't think it matters if your property is a small urban space as we will need to design for small spaces too.
http://www.bigskypermaculture.ca/
http://www.vergepermaculture.ca/
Check out these Calgary Permaculturists who are running courses. Check your community, you might have brilliant people in your neighbourhood.

Friday, December 17, 2010

Vertical Veggie Farms New Website

Dec. 17, 2010 Wax Bush Bean Flower
Seeds of Change
Vertical Veggie Farms now has a website and you can go there now.
verticalveggiefarms.com

You can find out why Vertical Veggie Farms are part of the leading edge of solutions for Urban Agriculture and find out why Vertical Gardening is gaining popularity.

It is snowing light fluffy snow today, Dec. 17, 2010, and to my delight, inside on my Vertical Veggie Farm, my bean plants started flowering. It won't be long before I have some nice bush beans to feed my family. My lettuce is growing really well and I am struggling with the urge to let the leaves grow bigger or to have some baby green salads. Maybe I will wait for Christmas dinner to serve the first salad, then have turkey sandwiches with fresh VVF lettuce.

Thursday, December 16, 2010

Gifts for Winter: Frankincense and Myrrh

Today it is snowing a light dry powdery snow that skiers wish for and children love to brush their bulky knit mittens through; it is a beautiful winter wonderland outside. I am inside struggling with a chest cold an in an effort to make me feel better, I put some frankincense and myrrh in my vaporizer. The fragrance from these resins fills the air with an ancient spicy warmth.
Frankincense (left), Myrrh (right),
combined in vaporizer, just needs a bit of water;
can be reused until gone

The gum from these small trees or shrubs were widely used in Egypt, India, China, and North East Africa near the Red Sea Region and considered to be as valuable as gold. Frankincense and Myrrh is well known as two of the three gifts of the Magi, gifts from the Three Wise Men to the infant Jesus. The tree gums were made into an essential oil by mixing with oil or water. These plants from the Cradle of Civilization have come with us as treatments for ailments. I don't know if anyone knows how essential oils in aromatherapy works as a treatment but they have been used for millenniums.  

I didn't really think about possible uses of frankincense and myrrh until I started using essential oils. Myrrh has many uses as a therapeutic essential oil, commonly used for menstrual problems, haemorrhoids, as well as for amenorrhea, leucorrhea, pruritis and thrush. Frankincense is associated as a treatment for cystitis, dysmenorrhea, leucorrhea and metrorrhagia. When I first read that they were treated for women's genito-urinary systems, I thought, maybe the gifts weren't for baby Jesus but for postnatal Mary.

Of course these wonder gums have many other uses, one of my favourite is that they work on the respiratory system, helping to calm colds and the flu. Now every December, I bring out the frankincense and myrrh and put it in the vaporizer to not only ward off or to treat illness, but to also fill the air with the rich, ancient smells of the Middle East. I associate the smell with a connection to the rich history of mankind's ancient wisdom. It comforts me to have the same fragrance in the air that women like Cleopatra might have had. It quite simply makes me feel connected to women throughout history and I like that.

a clay vaporizer,
heated with a small votive candle
Well it wasn't until I started writing this out that I have such a strong link between scent and meaning, but there it is. I know a lot of women have strong pulls to scent; look in any product marketed to women and it will be heavily scented. Given that many artificial scents are not healthy and are sometimes even damaging, I hope that you might recognize your pull to scent and become a conscious and safe consumer of cosmetic and medical products.

Myrrh should not be used during pregnancy; avoid use around pregnant women. 


This information is not to be taken as medical advice; readers must take responsibility for their own healing, consulting a qualified practitioner when needing medical attention. 

Sources:
Lacroix, Nitya, The Scented Touch, Sebastian Kelly, Oxford UK, 1994.
Lawless, Julia, The Illustrated Encyclopedia of Essential Oils, Element Books, Inc. Rockport, MA, 1995.

Wednesday, December 1, 2010

Beeswax Candles

Beeswax Candles & leftover puck of wax
Wax courtesy of Jerremie Clyde
Photo Credit: Ursula de Vries
Making Beeswax candles is easy, pleasant and good for you and the planet.
Those of us who want to be more environmental can reduce electricity use by using candles. While participating in Earth Hour in March of 2010, I clumsily spilt hot paraffin wax all over my arm and realized that not only was I breathing in petroleum byproducts, but I was getting skin contact too. I decided then to get rid of all the paraffin and artificially scented candles and replace them with beeswax.
I was planning on getting bees so beeswax was a bonus yield along with nutritious honey and garden pollination. We plan on getting bees in the spring and won't get any beeswax until the following autumn, but I didn't want to wait to start using candles so ordered some moulds and wax from the BeeMaid Honey Online store. http://www.beemaidbeestore.com/
Beeswax straight from honey extracting with globs of honey on surface
Wax Courtesy of Jerremie Clyde
Photo Credit: Ursula de Vries
Melting Beeswax over water double boiler
Photo Credit: Ursula de Vries
Pouring beeswax into rubber mould
wick held in place with Prusik knot tied to stick
Photo Credit: Marilyn Way
I wanted to get some candles made prior to the Winter Solstice to have some natural light sources on the shortest day of the year. While checking out the exact date and time, I discovered that the burning of beeswax helps lift your mood by releasing negative ions into the air.

I knew that burning beeswax created a lovely light scent of honey in the air, but didn't even think about how fragrant the air would be while melting the beeswax. The entire house was perfumed with a sweet floral aroma that was comforting on a cold November afternoon.

When we started melting the raw wax from my beekeeper friend, (www.urbansunflower.ca) I was worried about bee legs and wings becoming part of the candle and smelling bad as it burned. As we melted the wax, most of the honey and bits of grass and bugs either floated or sunk to the bottom of the pot. We placed a bit of cheesecloth over the metal funnel as we poured the melted wax into the moulds.
I wanted to save the cheesecloth and show it to my kids after because there were bits of pupa, larva and bee parts but the wax clumped everything together and dried cloudy. I saved the ball of cloth, wax and bits for a fire starter. There was a little bit of wax leftover and we kept that for either next time or to use to make lip balm.

The wax in the candles shrunk as it cooled and was easy to pull from the moulds. When we took them out, the candles made from the raw, honey covered wax was just as beautiful as the candles made from the filtered store bought wax.

The process was pretty much an adult activity because of the temperature but the kids were buzzing around curious about this activity.

A friend of ours came over with a box of beeswax sheets and we made candles with the kids. We cut a piece of wick, laid it across one end of the sheet and pointed the hair dryer to soften the wax as the kids rolled up their own candles.

We could have added some essential oils or wax crayon peelings for scent and colour but decided to just do it natural the first time. I bet some frankincense and myrrh would have been lovely for use in the winter to ward off colds and the flu.
Beeswax candle making in silicone muffin mould
shown with metal funnel/cheesecloth strainer
Photo Credit: Ursula de Vries

Rolled Beeswax Candles
Courtesy Laurel Halladay
Photo Credit: Ursula de Vries

Completed Rolled Beeswax Candles
Photo Credit: Ursula de Vries

"Also, insufficient sunlight in the short winter days increases the secretion of melatonin in the body, throwing off the circadian rhythm with longer sleep. Exercise, light therapy, increased negative ion exposure (which can be attained from plants and well ventilated flames, burning wood or beeswax) can reinvigorate the body from its seasonal lull and relieve winter bluesby decreasing melatonin secretions, increasing serotonin and temporarily creating a more even sleeping pattern."
http://en.wikipedia.org/wiki/Winter_solstice

Thursday, November 11, 2010

Vertical Veggie Farms

Portable Year-Round Indoor Hydroponic System for Home, Office or Institution

  • Garden in your window
  • Grow fresh food even in the middle of winter
  • Intense and productive growing material
  • Uses recycled materials
  • Moves with you

Custom Builds available for Schools, Elder-Care Facilities, Hospitals, Businesses, Community Centres, Correctional Centres, etc.

Now you can now grow vegetables year-round for very low cost in your picture window or patio door. Utilize free solar energy and still enjoy your view out your patio window.
I am very pleased to launch the Vertical Veggie Farm. You may now place your order for delivery.
The cost is $340 to purchase.
As I am a strong believer in sustainability and encouraging local businesses, I offer a discounted price to those willing to pay in Calgary Dollar$; the cost is $300 (of which 25% or $75 may be paid in Calgary Dollar$).
Launch of the VVF at Hillhurst Sunnyside Calgary Dollar$ Potluck, November 10th, 2010.
This is the mini version. The full version has 4 rows of planter spaces with a fifth row for reservoirs.
Delivery within Calgary city limits available for $15.

The Vertical Veggie Farm is a moveable hydroponic system that is oriented vertically to take up little floor space. The full system measures 62" high, 20" deep, and 45" wide.

The system includes: moveable stand, wire suspension columns, 15 plant spaces and 5 solution reservoirs (made from recycled bottles), 4 daylight 23W CLF bulbs (100W equivalent), suspended lighting system, timer, 15 hydroponic starter cubes, hydroponic growing fill (food grade plastic made from recycled bottles), plant cups, organic hydroponic solution, pH tester kit, weed block fabric, and heritage seeds: beans, lettuce, chard and kale. You will also receive instructions for: assembly of the unit, seeding instructions, hydroponics basics and troubleshooting your growing vegetables.
Kit comes fully prepared, simple assembly tools provided.

Takes little electricity: the CLF bulbs are the only electrical component with each bulb only requiring 23W to deliver the equivalent of 100W per bulb. The lighting only needs to be turned on during the short winter days or when you want to boost the growth of your plants.

Takes little time to maintain: Change the hydroponic solution each week. Occasionally clean the plant reservoir holders as needed. Harvest continually.

Harvestable plants will be ready between 40 - 60 days depending on intensity of growing and plant species.

It is an exciting time for hydroponics with the introduction of Compact Light Fluorescents. Traditionally, hydroponics operations have required expensive to purchase and operate lighting ballasts. Systems took up a lot of floor space so the hobby or home hydroponic user had to set aside a large space or even room to grow. Because the areas were so big, they had to be out of the way, requiring extensive ventilation and heating. The high cost of operating these systems meant that high profit/yields were the priority unless it was for a commercial outdoor greenhouse.
Now the average apartment dweller without land access can have fresh vegetables using free sunshine, regular room temperatures with no ventilation worries. Low income households can set up a system and have access to continuous harvests of low cost, fresh, tasty, and nutritious vegetables with minimal work.

Ursula de Vries
Founder, Designer and Builder
verticalveggiefarms@gmail.com
403-542-4321
http://tinyurl.com/facebookvvf
verticalveggiefarms.blogspot.com

Friday, August 20, 2010

Clotheslines in the City

It took me awhile but I have started using the clothesline. It took me awhile to get it going. I hung it up between posts by my walk-out basement. The patio door is the closest to the laundry room and I figured it would be easiest on me as I imagined lugging a heavy basket of wet clothes. I used a retractable clothesline incase we entertain in the area.
The patio has interlocking paving stones which get covered in leaves and dust very quickly. I will have to do sweeping frequently because I don't want to drop clean wet laundry on a dusty ground. I can see the merits of putting a clothesline over grass as dropped clothes are less likely to get dirty.

As I hung my dark blue towels, I thought that the sun might make the colour fade. I have started switching from white towels or linens to darker colours because I wanted to avoid using bleach.
I imagine that a generation ago, people used sunlight to bleach their white linens. Now we know scientifically that sunlight will rid fabrics of viruses.
I think I will dry my clothes outside when it is nice out and then line dry my laundry inside when it is below freezing.
As to the issue of colour fading, I could have my warm weather clothes in lighter fabrics and then go with darker colours for the winter months.
I remember reading that a large city had a law which stipulated that undergarments were not to be hung outside as it was considered indecent to hang your unmentionables where others could see them. I plan to hang our undies inside.
I find it interesting that our generation associates line drying with either poverty or fringe environmentalists. My grandmother had to go outside to collect frozen overalls off the line during the winters in Winnipeg. I imagine cold fingers grasping people sized cardboard representations and leaning them against the kitchen wall until they thawed enough to fold.
I am finding that it does take longer to put the laundry on the line than it does to just chuck everything into the dryer. What is time saving is that I can remove the laundry in groups and fold as I go, making little piles of jeans, shorts, short-sleeved t-shirts, long-sleeved t-shirts, etc.
So far so good, I just have to remember the laundry when a thundershower breaks.

Monday, June 7, 2010

Small Changes: Butter is Better

We have really reduced our garbage output but I have really want to reduce the amount of things we need to recycle. Even though plastics get recycled, the processing of the plastic and the transportation of the plastic to the processing plants requires so much fossil fuels. I am determined to reduce the amount of plastic going into the recycling bin.
I was at Costco one day and I saw a fellow walking around with 3 bricks of butter in a clear plastic bag. My first thought was, there is a big reduction in packaging. I thought about switching from margarine and their containers to butter wrapped in foil. So simple and so much plastic use would be avoided.
I thought to myself, why didn't I think of this earlier? I realized that I had gotten into a margarine habit, leftover from when I was allergic to milk products and had to use a kosher, completely dairy free, margarine rather than feel like I had squirrels running through my intestines. Avoiding all milk products for 10 years gave my body the time it took to stop thinking of milk as a poison and then I was able to use it, and butter again.
Since then I guess I avoided using butter because I still had the 'margarine is better for you' campaign in my distant memory. I couldn't remember why it was supposed to be better or why butter was supposed to be bad. I thought about butter being just stirred cream and how margarine was a mixture of oils greatly processed. I thought of the factories that produced each product and although I have never toured either, I know intuitively that butter requires less processing, less land and machinery. If I bought organic butter, then even the humane treatment of cows could be confirmed.
So I made the switch to butter and I put it in an old margarine container. My next step was to find a permanent butter dish. I thought about buying a nice butter dish, but thought about it being shipped around the world to me, and I got suspicious about the ethical treatment of the workers in a far off factory. I thought about using an old silver butter dish but didn't have the time or childcare to go digging in an antique store in town. I thought about buying something on line, but then kept thinking about local. Also I think a silver butter dish would show little finger prints and I didn't want to use chemicals to polish it. I thought that maybe getting a clay butter dish from a local market might be good in support of local artists or artisans.
On the weekend at the farmer's market, I took a look around. I found a booth with a woman selling clay butter dishes and remembered that clay is found in Alberta all around the bad lands area, Medicine Hat being famous for clay products. Getting a dish made from local materials fit my bill. 
The butter dish she sold was called a French Butter Dish, French Butter Keeper, or Butter Crock. It is an old French method of storing butter without refrigeration by putting butter in a deep lid and putting the lid in a bowl of water. The water keeps the butter from the air, helping it to stay fresher longer. The butter stays at a spreadable temperature at all times so it is easy to use. Upkeep is as simple as changing the water everyday for freshness.
Tips: make sure you can pick up the lid with one hand, resist the urge to get a bigger butter dish.


Permaculture Principles:
1. Observe & Interact:
Making small changes that work for your family take observation as to what you and your family need and desire. This was an easy switch for my family. When we started talking about food choices, it turned out that the older members preferred butter over margarine anyway.
6. Produce No Waste:
It is a small change to stop buying margarine and their plastic containers, but over a year, we were really using a lot. If you smashed them up and put them in the ocean, their effects could be devastating. I will consider the worst case scenario when thinking about the consequences of my shopping choices. Charles Moore on the Great Pacific Plastic Garbage Patch 
 9. Use Small & Slow Solutions:
Blogging about butter may not seem like the beginning of world peace and fixing the environment, but if more people look at cumulative little changes they can make to reduce fossil fuel use and low tech solutions, I am confident that it will make a big difference.

Monday, April 12, 2010

Girlfriend's Guide to... Getting into Gardening

Plant what you like to eat fresh and what your kids and husband likes. Everyone in my family likes lettuce so we ate that all summer.


Think about your favourite preserved foods. I go crazy for pickled beets so grew them and canned them and brought them out ‘for special.’

Consider your work load and time commitment. I really like swiss chard, but hated the amount of time it took to wash, look for bugs, then blanch, drain, cool and bag. It didn’t seem worth it when my kids wouldn’t even eat it.

When your kids are young, plant vegetables that they can help process to make your job easier. We spent many afternoons sitting on the deck popping peas from their pods and putting them in a colander to be blanched and frozen later. Once your kids are old enough to use a knife, get them to sit and watch their favourite movie while snipping the ends off the beans.

Understand that it is an important experience for your children to eat food directly out of the garden. Let them eat sun warm fresh veggies.

If wasps are busy drinking water as you water your garden, don’t wear a knit sweater, wear a tight knit fabric to prevent the biters from getting caught between you and your sweater.

Keep a hankie in your pocket if your nose runs.

Put up some poultry wire around your garden to prevent your dogs from discovering that they like potatoes and carrots. Our dog went digging for a vole and discovered he like fresh veggies too.

When spending the day outside doing heavy work, pause and stretch your muscles. Bend at the waist and touch your toes. Stretch those arm, back and leg muscles because gardening can be hard work and your body needs a break.

Take pictures to mark your progress and to remind you of what you did so you can make changes or keep doing what works.

Have a Garden Party. Show off your work and chat it up with your friends and celebrate your success whether it is in the beginning, middle or after harvest. The enjoyment of food is a very social experience and what can be better than serving your friends and family food that you grew?

Try to discover a new recipe with an ingredient from your vegetables, herbs or fruits. I recently had Limestone Lemonade made with lemon juice, lime vodka and a sprig of rosemary, my mouth is watering and wishing for weekends on the deck. http://www.tastereport.com/TasteReport.com/Drink/Entries/2009/2/24_Cocktail_Nation:_drink_experts_dish.html

Leaping Down the Garden Path

It was a synergistic year for me, everything lining up perfectly so that I could get a vegetable garden going. It felt like the universe was begging me to get my hands into the dirt. I was a stay-at-home mom and the youngest of my five kids, the triplets were past the age of putting every found object in their mouths; I was able to take them from the deck to the yard without the worry of needing to watch them like a hawk. We were able to hook up to city sewer and water through our front yard, leaving our backyard free and clear to put a vegetable garden in without worrying about having to rip it up midseason. My husband’s work contract was due to run out and I felt an urgent need to learn how to feed my family directly.

I was planning to put in some raised beds so that the dogs and the kids wouldn’t run through the vegetables. My father-in-law mentioned that raised beds are more accessible for people with poor mobility and I wanted to build so that it would be easy for him to garden if he ever came to live with us. Raised beds are also good so that you don’t need to be constantly bending over and getting a sore back.

As I was planning to put in some raised beds, a couple of people came to visit from Green Calgary’s (then Clean Calgary) Healthy Homes Program. They told me about lasagna gardening and the importance of buying local food because of the degradation of the planet caused by food shipping. I went to the store and bought seeds for my favourite vegetables. My father-in-law came to visit and he and my husband built four large raised beds. My father-in-law also gave me the book Square Foot Gardening so as they built, I planned the layout of my garden. I collected newspaper and leaves from neighbours and layered them with twigs and peat moss and compost with loam mix. It snowed in late May so I waited until June 1st to plant the seeds.

To my amazement, the garden actually worked. Water, soil and sunshine were the simple things it took to get things growing. I was struck that such a small seed could grow into a mature plant. Radishes, lettuce and potato plants popped up quickly. I planted zucchini seedlings and their big elephant ear like leaves quickly covered their bed. Vibrant purple veins sprung up from little balls of beets. My daily routine involved visiting the garden marveling at the speed with which these plants reached for the sunshine. I would stand with the water hose and spray the garden, the sound of water rushing and the warmth of the sun on my back comforted me as deeply as any religious service. The smell of fresh turned dirt felt familiar on a cellular, on a genetic or evolutionary level. With every step into gardening, I felt like I was coming home.

As my garden grew, I realized that other than eating fresh carrots and strawberries from my mother’s garden when I was growing up, oh, and that one time that potato plants grew out of my little compost pile, I had never grown vegetables and had no idea when to harvest. I started doing research as to when to tell when radishes were ripe, when and how to harvest lettuce. I picked the radishes and found to my delight that my kids didn’t like them so I could eat them myself. I did save some for myself and restrained myself to share with my husband. Unfortunately I wasn’t until I started cutting them up that I noticed little worms. I had forgotten about doing bug checks. I hadn’t thought about bugs at all. I needed to look into that and finding natural ways of preventing bugs.

Imagine how elated I was to discover that if you cut lettuce off leaving an inch, the lettuce will produce another head. I thought I would have to replant all summer, but to my delight, my little lettuce plot could produce all summer.

We had fresh salads every single day. I raided my potato plants too early to get new potatoes. I would point out to the kids every time we were eating something from our garden. That summer we only shopped for meat and dairy products. We were making our own bread and growing our own vegetables.

Throughout the summer, I was getting daily email notices from the Canadian Food Inspection Agency about salmonella in spinach, lettuce and pistachios and Listeria in meats and processed food. The food delivery system was failing and we were all vulnerable; our children, sick, and elderly were most at risk for chronic damage to tainted food. I suspected that in the desire to bring costs down, corporations were cutting corners in food safety. I was more determined than ever to learn how to safely grow and handle food to make sure my family was protected.

I thought more and more about local food sources. I started foraging in my yard, finding Nanking cherries and Saskatoon berries. I moved the rhubarb to a better location hoping for big yields in future years. I pruned and fertilized my crabapple tree. I planted more perennial herbs. I looked at sub climates in my yard and looked into planting more fruits and berries; I planned to plant super foods like blueberries near my fir trees. I vowed to no longer buy shrubs or trees unless they were food producing. I started to imagine my whole yard as food producing.

I started thinking about different seeds to get and new that experienced gardeners poured over seed catalogues all winter. I did a search for seed catalogues and found heirloom seeds. Another door into sustainability opened as I saw that certain varieties of plants are important to continue to maintain genetic diversity. I had heard about the Irish potato famine and knew that agribusinesses’ reliance on a select few strains of vegetables and genetically modified foods was not good for the future of food. The trail led to Salt Spring Seeds on Vancouver Island and their Zero Mile Diet kit. The thought of growing my own wheat and grain for my own breads got me thinking of how to even further push my self-reliance.

My next step was to learn how to preserve the harvest that we weren’t using right away. I loved pickled beets so went shopping for canning supplies. My first attempt at finding used canning jars on Kijiji was successful and I got a pantry’s worth of big jars. I was chatting it up about gardening to everyone and then found some friends who canned all the time. They even bought me the quintessential guide to canning filled with facts and recipes. I had read the book Pickled, Potted and Canned: How the Art and Science of Food Preservation Changed the World by Sue Shepard. http://www.amazon.ca/Pickled-Potted-Canned-Science-Preserving/dp/0743255534/ref=sr_1_3?ie=UTF8&s=books&qid=1271101654&sr=8-3The book outlined the sometimes accidental discoveries in food preservation and how the processes worked. I appreciated the scientific discoveries that we took for granted that enabled us to eat in a climate with a short growing season.

My first attempt at canning involved peeling tiny beets and boiling vinegar during a hot summer day with 5 kids home and curious to hang out with me. I was flipping pages in my book while wearing oven mitts, trying desperately not to burn myself, my kids or spill purple juice all over my canning book. I was all for the idea of self-reliance but understood in that sweaty panicked moment that some things are best learned as an apprentice, not just via a book. My half-sister, an experienced gardener and canner, came to visit later that summer and she and I pickled zucchini spears, made strawberry freezer jam, mint jelly, canned Bruschetta and liquor soaked pears. It was an awesome inheritance.

My pantry filled with the fruits of my labour and I felt like I had surpassed what Jane Austin described as an ‘accomplished woman’. That Thanksgiving everything but the wine, turkey and cranberries was either from our garden or homemade; I was truly thankful for the bounty of my garden.

As I noticed my stores dwindling, I thought about how to increase my garden yield. I would analyze what grew well and what my kids liked to eat. I would try to find more recipes for preserving foods that I used year round such as ketchup. My goal was that within 3 years, I wanted all of my vegetables to come from my own yard.

Secretly, I wondered how to enjoy the vibrant culture of the city while being completely self-sufficient by getting fruits, dairy and meat from my yard as well. Enter the backyard chicken…

Getting to Permaculture

I must have been about 10 years old when I saw and was fascinated by the cover of a magazine, I think it was Mother Earth News; it had a sketch of a homestead with a two story house with a wraparound porch, a beehive, sheep and a wind turbine. I looked at that and thought that is exactly what I want when I grow up. I thought it would be so cool to have everything I needed in my own yard. I must have been a home body and part hermit even back then and the idea of getting honey, wool and electricity from my own yard was ideal.


It was just recently that I remembered that childhood dream, as I learned the skills and put into practice becoming more self-reliant, I realized how blissfully happy each change made me. I felt drawn to different skills and would study books and the internet to learn how to do different things. As a young woman I collected skills, learned how to do things and why we do things. As I learned something I felt drawn to share the information. I was collecting skills and knowledge and it all had to do with becoming self-reliant. I was collecting the pieces of a large puzzle and it wasn’t until a friend asked me if I was into Permaculture that I realized that I was deep into it, yet didn’t know the idea existed. My puzzle had a title.

As I have learned more about Permaculture, I have felt a complete mesh with the philosophy and systems of it. As I read the standard texts about Permaculture, I have recognized books that I have read and cherished. The ideas presented have articulated the concerns I have had in terms of the problems I see in our society. I experienced an intellectual homecoming.

Looking at my current situation, I see that there are lots of ways that I can make changes in my household and I am working diligently to convert my household into a Permaculture Suburban Farm. Follow along as I make and describe the changes.

Friday, January 1, 2010

Permaculture Ethics & Design Principles: Processing Pheasants


Permaculture Ethics


Care for People: looking after self, kin and community, by learning how to process a bird for eating to feed myself and family as well as sharing information with others.

Permaculture Design Principles:


6. Produce no waste: I saved the feathers for my chicken coop as warm nesting box bedding. The only waste produced was the head, feet and innards; I will look for uses for those before I do it again.


9. Use Slow and Small Solutions: purchased free range pheasants from local small ranch.


10. Use and Value Diversity: put pheasants in my freezer to feed my family a different type of meat as we typically only eat chicken, pork, beef, and fish.


12. Creatively Use and Respond to Change: I recognize that with global warming and peak oil, our way of doing things will change and I want to be prepared for it, especially making sure I can feed my family when the fossil fuel subsidization of the current food delivery system starts to unravel.

Permaculture Icons used with permission. http://www.permacultureprinciples.com/

How to...Pluck and Gut a Pheasant

1. Grab live pheasant by head just below scull, hold arm down making sure the pheasant cannot touch the ground. Twist body around in a clockwise circle while holding head firmly similar to twisting a towel for a sharp towel snap. Do this very quickly to avoid suffering and to prevent bird from flailing and possibly breaking bones.

2. Hang bird by the neck with twine in a cool room above zero degrees Celsius to keep it from freezing and below 10 degrees Celsius to keep the meat from rotting. Smell the bird each day to check to see if it smells ‘gamey’ if so, discard immediately.

3. Set up your area with a table lined with newspaper, two lined garbage bags, a bucket for each bird, paper towels or cloths, a bone knife and a pair of bone scissors. Wear warm old clothes and a full apron.

4. Cut twine and take bird into your arm, placing breast side up and somewhere in the middle, start plucking the feathers going toward head. Pluck feathers and put them in into a bag for keeping. If any skin comes off, discard into a different garbage bag. Keep skin taught by pulling slightly on the skin while pulling the feathers out. Grab feathers from the base, while pushing the feathers down and then pulling feather out in the same direction as the feather growth. Pluck up to the neck, down to the feet, and then up to the second joint on the wings.

5. Take a knife and score the skin on the foot. Hold the foot on either side of the scoring mark and break the leg bone. Place the foot on the top edge of a counter with the bird hanging down and the bone break at the counter corner. Keep the leg on the counter while pulling really hard down the other part of the bird leg until the foot separates. The foot will still have the tendons attached which will make eating the leg easier. Repeat for the other leg. Discard feet.

6. Grab head just below skull with one hand and just above torso with the other hand. Pull head from body with steady strength. Discard head.

7. With bone shears snip wing tips off on the outside of the joint. Discard wing tips.

8. Pull larynx and gizzard from neck. Birds hold gravelly bits in their gizzards to grind their food as they don’t have teeth for that. Place fingers in throat and scrape innards away from top of ribs as far back as you can reach.

9. Place the bird on the newspaper lined table. Locate the vent on the bottom of the bird and cut above the vent, pointing the blade directly toward the middle of the bird, preventing the piercing of the intestines leading to the vent. Place fingers into the incision and carefully pull the innards away from the bottom of the inside of the bird. Then pull the innards down and towards the incision. Be careful not to puncture the intestines as the odor can be unpleasant and could taint the meat. Discard innards.

10. Place bird in a bucket and carry to a clean sink. Rinse the inside and outside of the bird. Place in the fridge or in a sealed plastic bag then freeze.

11. Wash hands thoroughly using a nail brush. Throw garbage out. Save clean feathers for chicken nesting boxes, fly fishing lures, feather stuffed doggy beds, etc.

Time: 20 minutes to 1 hour, depending on plucking speed.

Disclaimer: Safe food handling requires certain considerations such as keeping food in cool temperatures, keeping feces away from meat and keeping yourself and the area very clean. Learn how to do these things to prevent food poisoning. Information provided does not include such considerations.

Girlfriend's Guide to...Processing Pheasants

  • Don’t wear lip gloss when plucking; the downy feathers float and are attracted to the hot air of storytellers.
  • Take rings off prior to scooping out the guts.
  • Wear a long apron to cover lap if you decide to lie down.
  • Tie long hair back as it can get in the way when bending over the sticky bird carcass.
  • Wear fingerless gloves if you are plucking in a cold room.
  • Try to apprentice with someone for your first time as this is a physical job that is easier to learn by doing.

Ponderings: Processing Pheasants

Upon being invited to a ‘pheasant plucking & cleaning party’ my first thought was that if I went and did it, I might be grossed out and not want to eat the meat and even turn vegetarian. To have real integrity when it comes to being self-sufficient and having a close connection to my food source, then I needed to not only attend, but should even learn how to kill my pheasant.
I asked ‘Jay’ if he could call me when he was going to kill the pheasants so I could be there and learn how to do it. He informed me that he was breaking their necks when he picked them up because he didn’t want to drive home with 20 live pheasants in his car and that he would be hanging the pheasants for 3 days before we plucked. As I had recently taken only 6 young chickens home in a box in the van and they kept escaping at every stop, I knew why he was leery. He promised it was really easy to break their neck and that he could show me.
When we arrived at his cool garage, the pheasants hanging there were beautiful. They were male with a vivid range of colouring that was magnificent. I imagined in times past, the kitchen staff of a wealthy manor saving the tail feathers for a hat for the Mistress of the house. Hanging meat is definitely a cold weather activity and coincidently, hunting pheasants is typically allowed from about Halloween to New Years.
http://www.freedigitalphotos.net/images/view_photog.php?photogid=902
I sat down to plucking with the body on my lap (it felt like a body to me) and the feathers came out pretty easily and I think that is because the bird was hung for 3 days. I felt like I needed permission to do this as this bird gave up its life, sort of, in order to become my food. But as the task master I am, I worked at pulling out the feathers as I thought about the bird giving up its life for my supper. It was odd holding the limp and cold body because it made me think of unconscious kittens in a strange way, the body was substantial yet cold and floppy so it didn’t really feel like a creature, it started to feel like a roast to me.
My mind drifted to my goal of self-sufficiency and then to using all of the body parts and using the feathers seemed easy. Fishermen could use the feathers for fly fishing lures. I am not sure if I would use the feet for anything, the only thing that came to mind was some sort of creepy key chain or voodoo style decorations. I wouldn’t even feed the head to dogs as the bones are hollow and can splinter. There must be some sort of use for the heads and feet that doesn’t involve drinking eyeballs or boiling brains which I am sure is considered a delicacy by some.
I made a few tears in the skin from vigorous plucking, but it was mostly intact. My husband’s bird had quite a few big tears in it so Jay taught my husband how to skin it. By the time most of my bird’s feathers were off, it resembled a store bought chicken much more except the meat was darker and looked reddish-pink and the tiny fat pockets seen through the translucent skin was almost yellow.
I was a bit creeped out at the thought of just pulling the head off. Jay demonstrated and held the head and body almost under his chin to take advantage of his upper body strength. I started to hold it that way too, although anticipated the head popping off and blood squirting everywhere. The blood was thick and coagulated so it would not have done that, but I was feeling squeamish. I held the neck in front of my belly and pulled really hard. It took quite a bit of strength and did come off eventually, but I didn’t actually see anything because I had my eyes closed. The larynx was there and Jay said that apparently you can blow through the larynx and make it cluck, some people do the same thing to cow larynxes and make them ‘moo’. That sounded like gross games bored teenage farm boys play.
I cut the wings tips off as taking the feathers out of the wing tips was hard to do and would require pliers; the wing tips looked like little angel wings. Discarded body parts were fluctuating from gross to angelic. Scrapping the inside of the cavity to separate the innards from the ribs was easy to do as I imagined the inside of a turkey carcass.
As a city slicker and even after reading books on chickens, I didn’t realize that the ‘vent’ was not only the hole that the eggs came out, but that it is the only ‘bottom’ hole and that the poop comes out of it too. Anyway, Jay cut above the vent, making sure he did not pierce the bowels. I then had to scoop out all the guts, trying to do it all in one scoop, bringing the stuff from the front of the cavity to the back. I pushed the guts toward the back of the bird and mistakenly started pushing poo out the vent. As I got the guts out, I saw the full intestines and said they looked so smooth like little sausages, Jay commented that they are cute little poo sausages. Isn’t it odd how many food items resemble body parts? I accidentally pierced the guts by pulling them or poking them and the smell of 3 day old dead poo filled the air; puncturing that in a room full of other people is like letting out the worst cabbage garlic whiskey fart. At least it was my first time so everyone was forgiving.
I looked inside and saw that there was something still stuck to the ribs. It was bright red like sweet and sour chicken balls, so I thought it might be the lungs, sure enough, it was. There was no danger of piercing anything smelly so I dug right in there. I was worried that puncturing the guts might leave a scent on my hands like lingering onion-it didn’t.
All in all it was a good experience, I ended up with two pheasants for the freezer, a bag of feathers for the hen house, and another feeling of accomplishment and the confidence that I can take care of myself and my family; I just need to figure out how to get my hands on a bird.